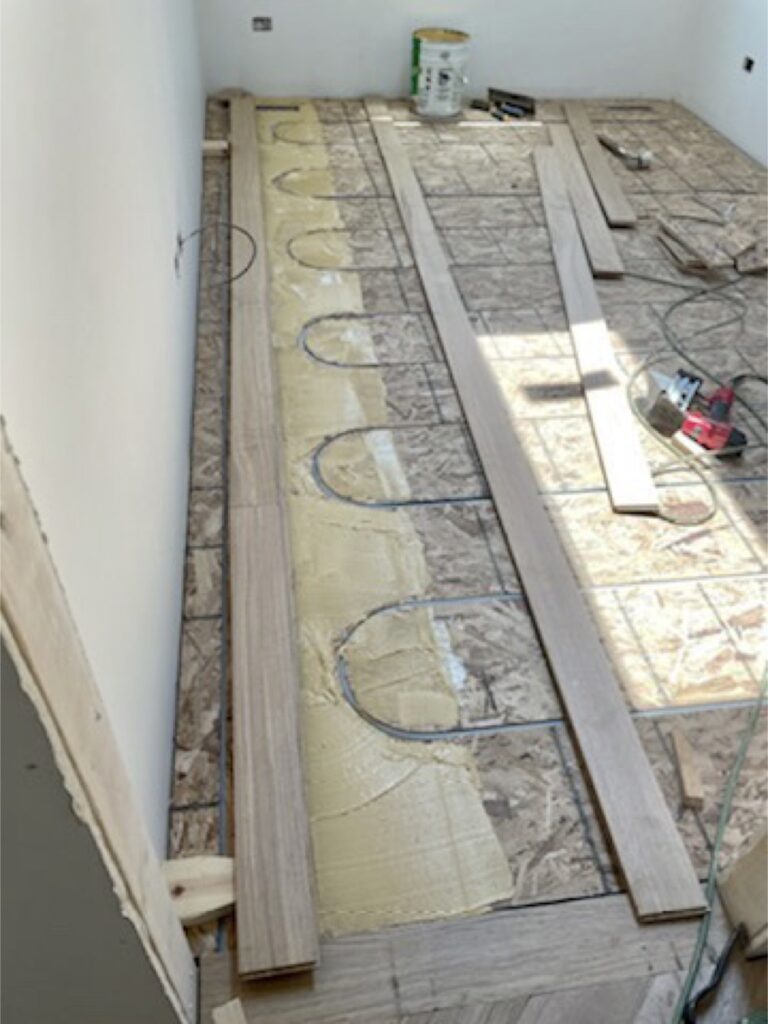
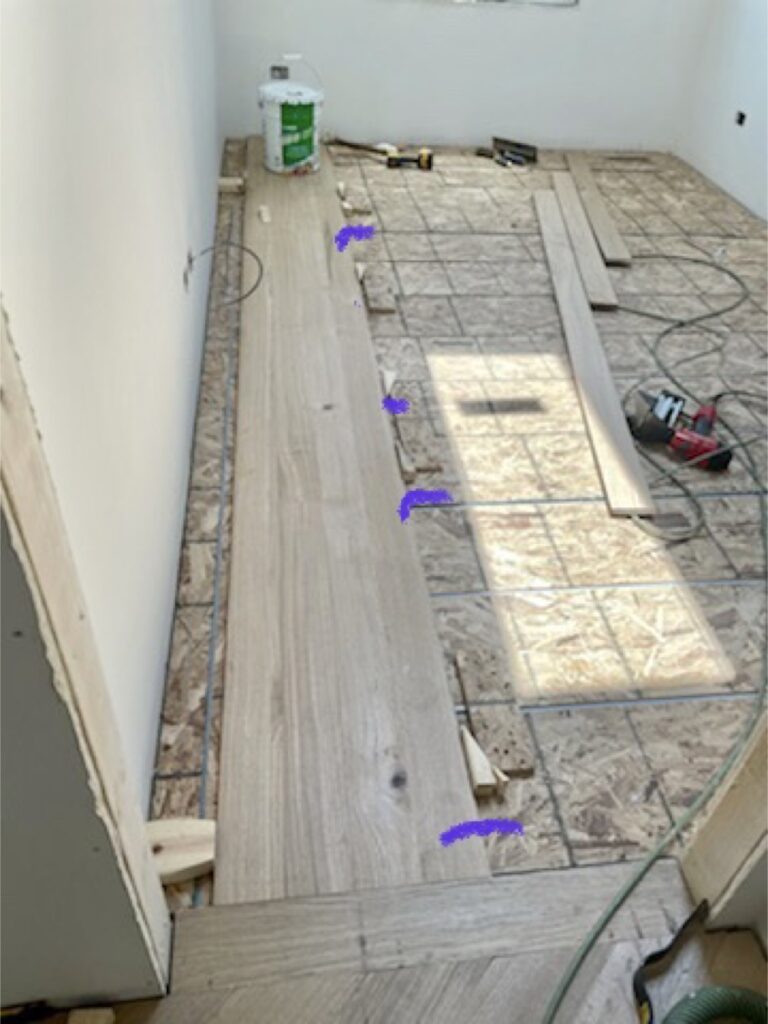
As some of you may recall I harvested white oak trees and turned them into the floor planks for the townhouse that I’m renovating. This process involved cutting rough planks from logs and then drying them using a vacuum kiln. The dried wood was further processed using a moulder to cut and process them into flooring.

Although this process was done with great care it lacked the precision of a commercial flooring operation. In addition, the planks were being placed on a subfloor where I had installed radiant heating tubes. This combination of issues led me to go to extraordinary lengths to secure the flooring to the subfloor. See the photos below.

I used a chalk line to make sure that my flooring was straight.
I started my initial pieces away from the wall because I wanted to make sure that I avoided the radiant heating tubes when I used my flooring nail gun.
blocks were used to keep the boards straight.
A strong flooring adhesive was used to stick the planks to the subfloor.
A flooring nail gun added an extra layer of protection. This gun has a finger trigger unlike some guns that use a hammer to trigger.
The process was repeated to add more boards.
More blocks were used and I hammered shims between the blocks and the wood to remove any gaps between the planks. I only could do a limited amount rows at a time as I had to make sure that the glue had dried before I moved on to the next set of rows. It was a slow process, but I’ll have a very well secured floor. The purple lines highlight the blocks/shims.