Over the last few decades Americans abandoned over-the-air (OTA) television in favor of cable and satellite TV. Initially, this seemed like a wonderful idea as consumers could watch dozens of crystal clear offerings. However, over time the novelty of subscription channels wore thin as the cost of cable and satellite services increased. This coupled with customer service horror stores from cable companies have pushed consumers to explore other options.
Some have found alternatives in internet services like Netflix, or bundled streaming services like YouTube TV and Sling TV. However, these options have subscription fees and are sometimes impacted by poor internet connections. However, there is a forgotten free service that may be an excellent substitute for pay TV and that service is OTA television.
In 2009 the US switch from analog OTA TV to digital OTA TV. At the same time they shifted the frequencies used to broadcast television signals. In the past there was low band VHF (channels 2-6), high band VHF (channels 7-13), and UHF (channels 14-82). The change to digital TV made the low band VHF channel obsolete, and most OTA TV stations shifted to the UHF band (although a few still use high band VHF). To make this change in frequencies less confusing to consumers digital TV adopted “virtual channels” so that a UHF channel can appear to be on a lower frequency. For instance, in Chicago channel 5 (NBC) moved from low band VHF to the UHF band, however it still appears as channel 5 on TV sets to avoid consumer confusion. Likewise, Chicago’s CBS channel 2 (low VHF) switched to high band VHF (channel 12) but still appears as channel 2 on TVs.
Over the years some TV frequencies were re-allocated for other services. For instance, the upper range of UHF channels were reallocated for cell phone services. This may make you think that there are less OTA channels to watch, however, the opposite is true. Unlike analog TV, digital TV can pack multiple video streams into a single channel, and many OTA channels will have multiple sub-channels indicated by a decimal system. For instance Chicago’s channel 2 (really VHF channel 12) contains channels 2.1, 2.2, 2.3, and 2.4. One TV station in San Francisco has 12 sub-channels attached to it. Unfortunately, the more sub-channels a station has the lower the overall videos resolution (definition). Therefore, most TV stations limit their number of sub-channels.
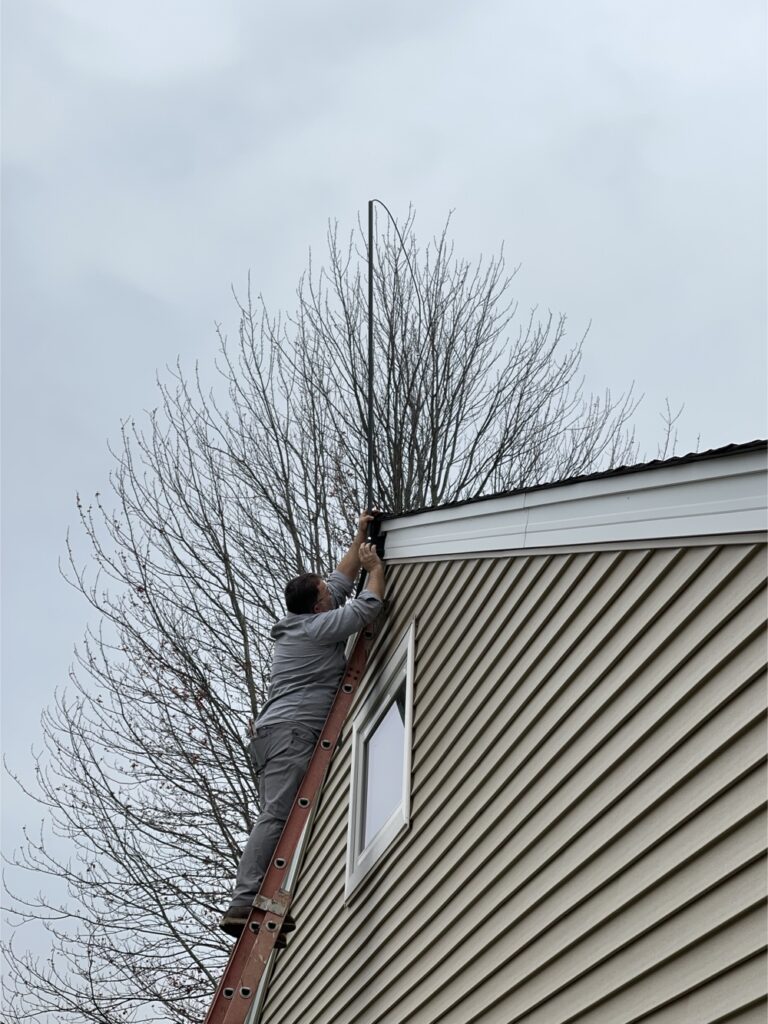
If you want to receive OTA TV you will need to purchase an antenna. If you are close to a TV station’s transmitter you can use an indoor antenna. However, if you are further away from the station’s transmitting tower you will need to have an antenna in an attic or (ideally) on your roof. The good news is that since digital TV mostly uses UHF frequencies these antennas are much smaller than the outdoor antennas of the past. When choosing an antenna pick a brand name like Channel Master, and avoid cheap Chinese antennas that promise ridiculous results (like receiving stations from 120 miles way). Most TV signals are designed to be received up to 60 miles from their transmitters. However, even at these long distances you will need a high tower and special equipment to get a good signal.
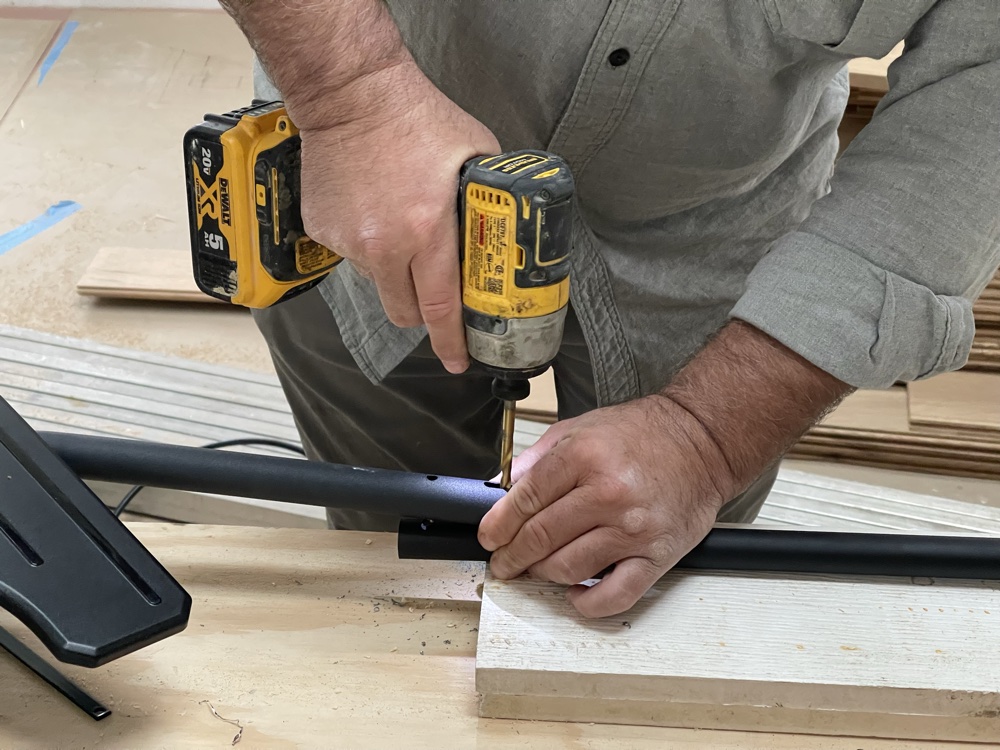
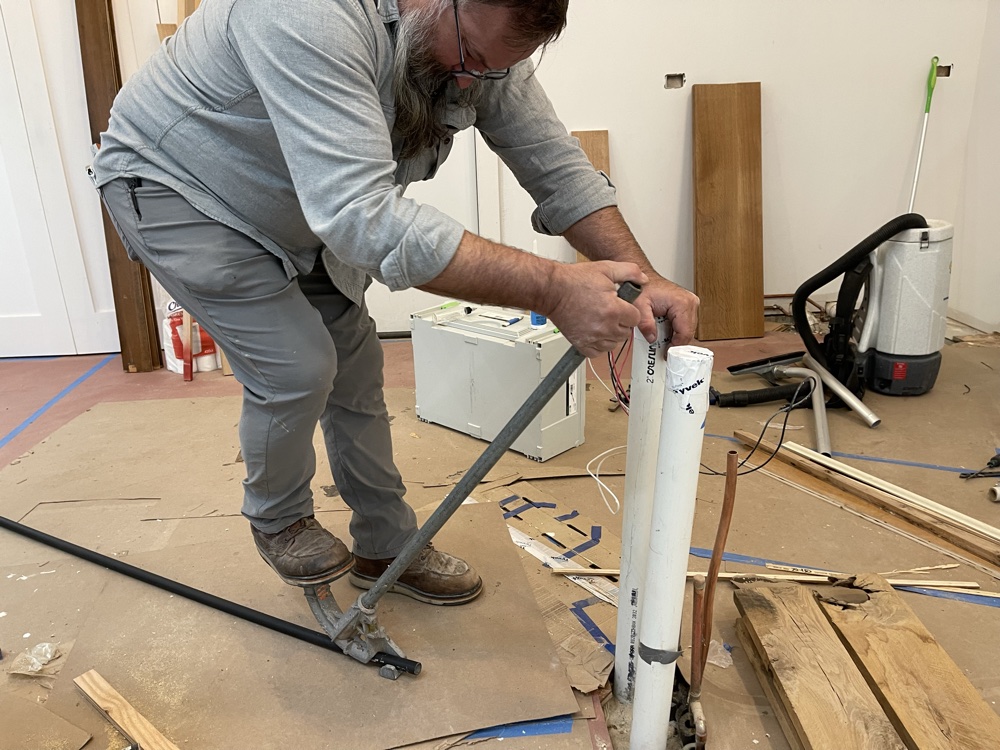
I installed a Channel Master antenna (UHF and high band VHF) on a home that is about 30 miles from Chicago’s TV transmitters. It was a simple install (see photos below). However, you must follow the instructions provided and avoid being anywhere near power lines. In addition, it is necessary to use common sense precautions when using ladders and when climbing on roofs.
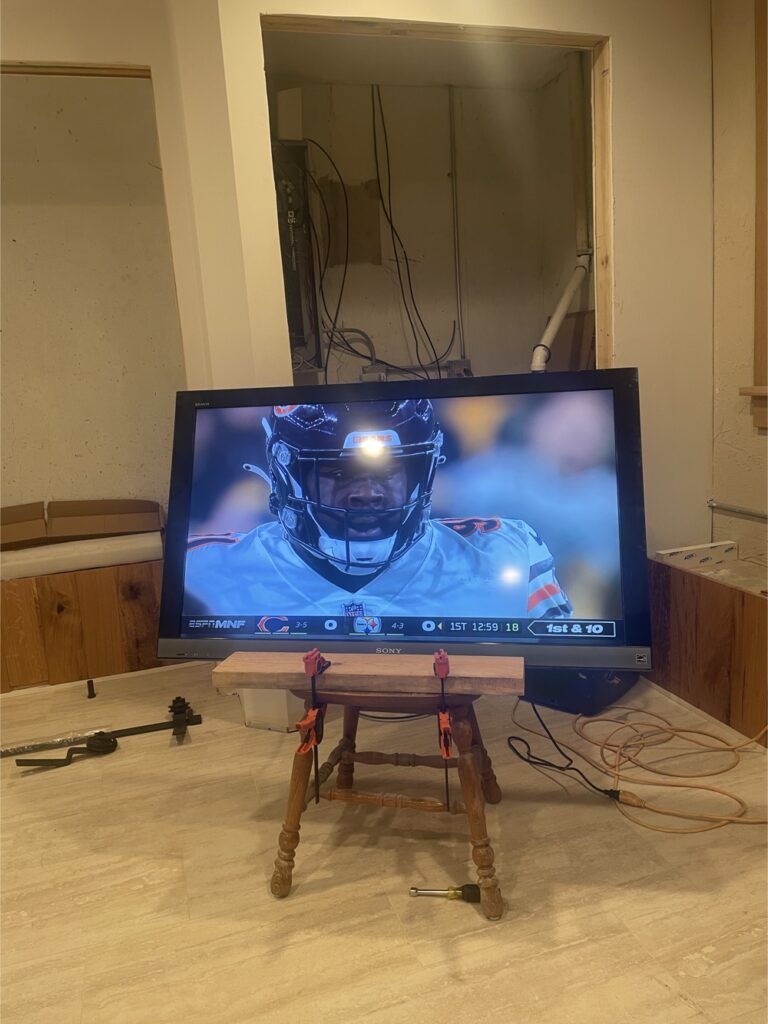
Lastly, once installed and connected you will need to go into your TV’s menu system and select “Antenna TV.” After you do that you will need to scan for available TV channels to find and store the active stations near you. In the old analog days there were less than 10 TV stations in the Chicago area. When I scanned for digital TV I found that I now have 90 stations that I can watch for free.